Pages

Monthly Challange

Monthly Challenge is
Here

Thursday 24 November 2011

Week 4

Hi Bloggers, HAPPY THURSDAY and welcome to our WEEK 4 CHALLENGE.
This week we are sponsored by
Shelly's Images

and your inspirational photo this week is


Here are the gorgeous makes from our DT this week


Kate

Kelly M

Caroline

Vikki


Kate has also made a great circle sentiment for you all to grab and use on your christmas projects. You do not have to use it on your entry for this weeks challenge, but it would be fab if you did


I hope you will all join us this week and be in with a chance of wining digis from Shelly's Images, we cant wait to see your creations.


Thursday 17 November 2011

WEEK 3


Hello Bloggers
and welcome to our 3rd weekly challenge. WOW it doesn't seem possible that its week 3 already, i can still remember being super excited about being on the design team for this new challenge blog.
So enough of me waffling on, here's your inspiration for this weeks challenge

awwww now isn't that a cutie, and our fabby sponsors this week are

so the lucky winner this week will be able to get something great from Crafty Sentiments Designs

Here's what the design team came up with this week


Caroline


Kelly M


Kate


Sadie

I cant wait to see your gorgeous creations for this weeks challenge.
Happy Crafting
Kate xxx


Monday 14 November 2011

Tutorials!

Be sure to check out our Tutorials page, the design team will be adding some fantastic tutorials over the next few weeks.  Kate has made one for a gorgeous gift box, perfect for all those little christmas presents!

Cute Christmas Box

Hi bloggers,
I thought i would add a little tutorial on how to make a sweet little box for Christmas gifts. These can be made in whatever size you like, for the tutorial i am making a 6cm square box using plain card, but you could use decorated card just as easily.
So here we go:

WHAT YOU WILL NEED
A4 SHEET OF CARD , RULER , SCISSORS , PENCIL , CRAFT KNIFE , DST , PAPER CREASER & MAGNETIC PAPER.


STEP 1. MEASURE 6cm UP FROM THE LONG SIDE OF THE A4 SHEET OF CARD AND MAKE A SMALL MARK.
STEP 2. REPEAT AT THE OPPOSITE END OF THE SHEET OF CARD.
STEP 3. LINE THE RULER UP ON BOTH MARKS AND DRAW A STRAIGHT LINE BETWEEN THEM.


STEP 4. MARK 6cm UP FROM THE LINE AGAIN BOTH ENDS AND DRAW A LINE CONNECTING THEM TOGETHER.
STEP 5. REPEAT THE ABOVE STEPA AGAIN SO YOU END UP WITH 3 LINES ALONG THE LENGTH OF THE CARD 6cm APART.


STEP 6. ON THE 1ST LINE YOU HAVE DRAWN MAKE A MARK AT 6cm , 12cm , 18cm , 24cm & 25.5cm.
STEP 7. REPEAT STEP 6 ON THE 2ND LINE AND THEN JOIN ALL THE MARKS UP AS SHOWN IN THE PHOTO.


STEP 8. MAKE A MARK 1cm TO THE LEFT OF THE TOP AND BOTTOM 1ST LINES AND 1cm TO THE RIGHT OF THE TOP AND BOTTOM 2ND LINES. JOIN UP THESE MARKS
STEP 9. CUT AWAY ALL THE SHADED AREAS IN THIS PHOTO AND YOU WILL END UP WITH THE SHAPE IN STEP 10.


STEP 11. MARK 1cm IN FROM BOTH ENDS ON THE 4 THINNER 'FLAP' SECTIONS.
STEP 12. JOIN THESE MARKS TO THE ENDS OF THE THIN 'FLAPS' WITH DIAGONAL LINES, AND CUT AWAY THE SMALL SHADED TRIANGLUAR AREAS.
STEP 13. YOU SHOULD HAVE THIS SHAPE NOW. SCORE ALONG EACH OF THE PENCIL LINES LIGHTLY WITH YOUR CRAFT KNIFE.


STEP 14. BEND INWARDS ALONG THE SCORE LINES.
STEP 15. USING YOUR PAPER CREASER RUN ALONG EACH OF THE FOLDS PRESSING HARDER TO GET A NICE CREASE IN YOUR CARD. YOUR BOX IS NOW STARTING TO TAKE SHAPE.


STEP 16. IF YOU ARE USING A PLAIN CARD THIS IS THE TIME TO DRAW YOUR DESIGN/PATTERN ON THE BOX. TURN IT OVER SO THE SIDE WITH THE PENCIL LINES ON IS FACING DOWNWARDS AND DRAW ON THE PLAIN SIDE. I HAVE USED A PAPERMANIA GOLD PEN TO DO A SWIRLY DESIGN ALL OVER MY BOX, YOU DO NOT HAVE TO DRAW ON THE 4 THIN FLAPS AS THEY WILL NOT SHOW.


STEP 17. STICK DST TO ALL 4 OF THE FLAPS, I FIND IT BEST TO COMPLETELY COVER THE FLAP WITH DST AND HAVE USED 2 DIFFERENT WIDTHS HERE.
STEP 18. TAKE THE PAPER FROM THE DST ON THE FRONT 2 FLAPS 1ST AND STICK TO THE BACK OF THE FRONT PANEL.
STEP 19. REPEAT FOR THE BACK 2 FLAPS AND STICK TO THE INSIDE OF THE BACK PANEL.

YOUR BOX IS NOW MADE, ALL YOU HAVE TO DECIDE IS HOW TO SECURE THE LID.


USING 2 STRIPS OF MAGNETIC PAPER 6cm X 1cm STICK 1 TO THE FRONT OF THE BOX A FEW mm FROM THE TOP AND THE OTHER TO THE BACK OF THE FRONT FLAP. THESE WILL NOW CONNECT AND HOLD THE BOX LID CLOSED.

 OR


USING 8cm OF RIBBON MAKE A LOOP AND STICK THE ENDS TOGETHER WITH DST. STICK TO THE FRONT OF THE LID FLAP SO SOME OF THE RIBBON LOOP IS STICKING UP ABOVE THE LID. INSERT THE LID FLAP INSIDE THE FRONT OF THE BOX SO THE BOX IS CLOSED BUT YOUR ARE ABLE TO PULL THE RIBBON TO OPEN THE LID.

YOU ARE NOW FINISHED WITH THE MAKING OF YOUR BOX, NOW ITS TIME TO GET THE GLITTER GLUE AND SPARKLEY THINGS AND DECORATE.


I hope you found my tutorial easy to follow, and if you have any questions please do not hesitate to get in touch.

Happy Crafting
Kate xxx

Challenge #1 - Winners

Thank you to everyone that entered our first challenge! It was great to see how our picture could inspire you all.

Our first winner will receive 7 digis from Bugaboo!
It was extremly hard for the DT to choose but:

The winner is: NUMBER 4 - LISA H!!

Congratulations, please contact Kelly for your prize!

Our top 3 are :


Congratulations! Please grab your winners badges from the sidebar.


Thursday 10 November 2011

Week 2 - Rememberance Day

Welcome to week 2 here at Just Inspirational.  Thank you to everyone who entered last weeks 1st challenge!

This week we are sponsored by:


The winner will get 4 images of their choice!!

Our inspiration for this week is:

Click here to go to the British legion website

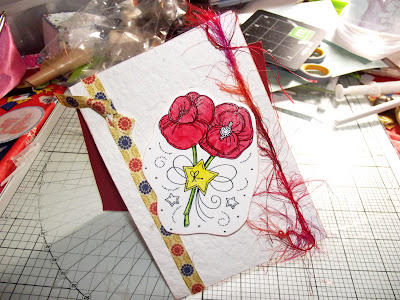
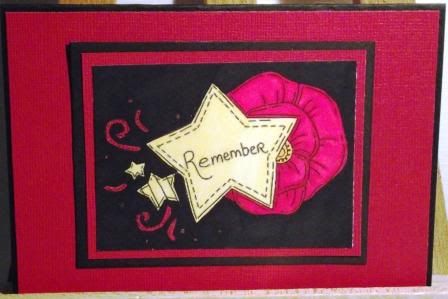
As i am sure you all know it is Rememberance Day on 11/11/11, so we thought we would honour this.  Here is what the Design Team did:

Kate


Vicki


Kelly M


Sadie


Dawn

Caroline


Monday 7 November 2011

WINNERS OF CANDY!

So sorry it has taken so long for me to draw the winners of the candy,  I would like to take this opportunity to thank everyone that joined in  and spread the word about this exciting new blog.

 Sooooo the winner of the surprise candy from me is:

Number 17!!! That's you Rachael!

The winner of a $9 voucher for

is:
Number 43 that's you Pauline!!

And last but not least, the winner of 2 sheets of digis from:
Whoopsi Daisy

Number 21 that's you Lisa!!

Congratulations Ladies! Please contact Kelly at kmsmith@sky.com for details of how to claim your prizes

Thursday 3 November 2011

Week 1 - WELCOME!!!!

Welcome to the first challenge here at Just Inspirational.  We have some fabulous challenges coming up and can't wait for you to all join in.

First i would like to introduce you to the Design Team:


Be sure to pop over and give them some love, i know a for a couple of them this is their first DT position and they are very nervous about it.

  So onto the first challenge.  The idea of this blog is for it to be inspirational and i always find inspiration from photos so our first challenge photo is:


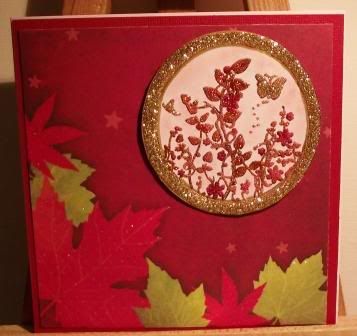
We would like you to take inspiration from this photo.  You can use the colours, the tree, leaves etc.  Please let us know what you have used in your blog post.

Our sponsor this week is


and you could win:


As a partnership with Bugaboo, they send us 2 of their teams projects and we send them 2 of ours, so be sure to pop over there

From Bugaboo we have:


And from the Just Inspirational Team:

Kate


Vicki


Sadie

Sandie


Kelly M


Carol


Erin


Caroline


Kelly S

Dawn

Now it's your turn.  All the rules are in the sidebar, we look forward to looking at all your projects!

Don't forget there is still time to enter our candy which ends tonight.  Enter here